Welcome to my channel,
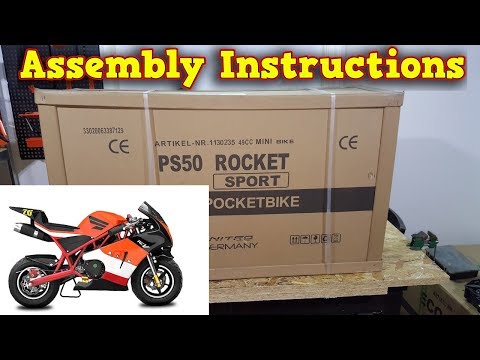
today I will assemble pocket bike 49cc
Ps 50 Rocket Sport from Nitro Motors
this is one of the best mini motos on the market you can get for your child or for yourself to have a fun
lets open the box
it is orange color
on the channel you find a video of this bike, but today we I will show how to assemble the bike properly
lets open the box
lets see what is inside
bike was delivered to me by courier company so I hope it is not damaged
here is carboard to secure the bike in the box
we can remove all this carboard parts
bikes is almost fully assembled
just few parts needs to be assembled and regulated
bikes looks that has not been damaged by courier company
lets see how it looks like
here it is, it is a really good quality bike in reasonable price
it has many upgraded parts compare to standard mini moto
tyres are made of much better material
it has easy starter
which make starting very easy
also carburetor is upgraded
it is much better carburetor 15mm
it gives much better throttle responce and better engine acceleration
lets start assembling the bike
here is little box with all the parts and tools
before we remove the bike from the box
first remove the stand from the liitle box
here it is the stand, it is litlle triangle
now remove the bike from the box
turn around the bike
and insert the stand
stand goes in to that small hole
now the bike won't fall
I have to say that bike looks really good, there is no damage at all even it was delivered by courier company as box
there is no scratches on the body so courier company did they job well
bike is equiped with 2 exchaust pipes
standard disc brakes like in all pocket bikes no hydraulic
fuel tank is aprox 1 litre capacity, but is enough for aprox 1 hour of fun
bike as you can see is almost assembled
you just need to regulate handlebars
regulate handlebars, regulate brakes
lets start from regulate handlebars
twist the brake lever down and straighten both handlebars
this lever is to tightened
we recieve tools with the bike
you can use them but if you have ones better quality then use them
you also will get mixing bottle
it is two stroke engine so you need to mix fuel with oil
here are footpegs which needs to be instaled
tank breath hose
and user manuals in.....
German language
you won't needed if you follow my channel
ok lets go back and loosen the brake lever
loosen the bolt
now we can twist down the brake lever
now we need to find best settings for handlebars
when we do that we need to be sure both handlebar are on the top of the forks
if you need to then move it in to the top
now make sure wheel is straights, lower the brake levers
now turn the wheel , make sure brake levers goes in to far spot in the plastic body
you need to find longest movement of the handlebars
here
here
this way you find best settings for handlebars
now you just need to tighten all bolts
you will need a allen key
you will also need spanmer no 13
where is that 13
allen key is to small
tighten well the bolt which holds handlebar in to fork
do not damage the bolt
the same on the other side
ok, check if both are tightened strong enough
if needed repeat
check again if the handlebars are in good position
I need to tighten this one again
now both are tightened well
now tighten brake levers
in this position we left them before
one
second
double check the position of the handlebars is corect
here is ok
now instal the front glass
here is the glass
there are two screws missing on the glass
there must be somewhere in the box, we will look for them now
here is the box
screws are here
instal the glass from the top
insert the screws in to the holes
and nut from the bottom on the each screw
instal all 4 screws
tighten all screws with screwdriver
hold the nut while tightening screws
you can hold it with finger, don't need to use spaner
the glass is instaled
now instal the footpegs
there are 2 footpegs and 2 bolts
instal the footpeg as per video
it's not easy, you need to push them in hard
you need to push then in to the end
little more
littlebit more
footpegs instal at this angle
when you seat on the bike your foot will be in the same angle
leave the footpegs at this angle and tighten the bolt very well
tighten it well
now turn the bike around
and repeat it on the other side
tighten the bolt
footpegs are instaled
this is all you need to assemble in this pocket bike
now you need to do check up before first start
check that all bolts are tightened
and all are regulated properly
we start from the top
check all bolts brakes, make sure both are working properly, if they need adjustments check my video how to adjust brakes
throttle
throttle is not working freely
we will check the throttle cable
throttle should work very freely
we will check cable
check where cable is coming to the carburetor
sometimes is not properly inserted in the carburetor
you need to remove the rubber cover
there is not much space
cable is not properly inserted in the carburetor
we can fix that now
insert the cable properly
instal the rubber cover again
now the throttle is working properly
check the air pressure in the wheels
both are well pumped here
brakes we checked already
now check both axles
I always recommend to check them before first ride for safety reasons
to make sure they are both tightened well
you will require spanner no 14 and 12
14
14 and 12
you need to check if the axle nut is tightened well
before you check the rear axle check the chain first
to make sure is properly adjusted
to make sure wheel alignment is proper
best is to remove the chain guard, there are only 3 bolts
remove the chain guard
remove the chain guard
first check how tight is the chain
here is perfect
we can press it with fingers is not to tight or to loosen
it is also very import to look from the back on the wheel
and make sure both sprockets are in one line
it happens that wheel is not instaled straight
and sprockets won't be in one line, the chain will fall even if it is properly adjusted
here both sprockets are in line
but if your sprockets are not in line, you just need to loosen the main axle
and then use both tensioners to adjust angle of the wheel/sprocket
then make sure chain is properly adjusted and tighten the main axle
you will find video on my channel how to adjust chain in pocket bikes
now instal the chain guard
the chain guard is instaled
now you can check that rear axle is tightened well
here it is properly tightened
check the kill switch
tighten it if needed
so it won't move around the handlebar
use the spaner to hold the nut on the back
we will need a spaner no 7
do not leave the switch in this postion
cos it can happen that it will cut the engine while turning
place it in this position
it won't turn off the engine while turning but we still have easy access to off switch
7
now switch is tightened
the last thing before first start is to check the fuel line
it is very important to check the fuel line, as sometimes the line is not connected to the carburetor at all
or it is compressed by other cable
or bended
here we can see the fuel line is not bended
it is connect to the carburetor and fuel tank
very good
as you can see this bike is very nice, it has strong frame, nicely painted
it looks really amazing
engine has few upgrades
it has easy pull start
with build in spring which will help to start the engine, it is much better then standard pull starts
it also has better carburetor
which makes the engine work smoother and accelerate better
it also has upgraded clutch on the other side
it has sport clutch with 2 springs only but very strong springs which don't brake as it can happen sometimes in the standard clutch when overheats
this clutch it is working much better and takes much bigger loads so adults also can have more fun
this pocket bike is really cool
if you would like to buy one, there is link to the online shop in the video
few days and you will have one of them
there is few colors to choose and bike looks really cool
in the next video I will show you how to start the bike properly, how to mix fuel
later we will be testing this bike, burning the tyre
and testing it hard
so check my next videos, thanks for watching, please subscribe.
 For more infomation >> Mini Game #6 Pierwszy zmontowany film! - Duration: 20:19.


 For more infomation >> Bucks, Nuggets, Knicks y Clippers, interesados en el 'mini LeBron' Bledsoe - Duration: 1:48.
  For more infomation >> MINI Countryman 1.6 ONE CHILI, Automaat / Xenon / Navigatie / Leder / 18" Velgen / Keyless entry - Duration: 1:00.
  For more infomation >> MINI Countryman 1.6 ONE CHILI, Automaat / Xenon / Navigatie / Leder / 18" Velgen / Keyless entry - Duration: 0:58.
 For more infomation >> Mini Lessons #3: Do you get it? - Duration: 0:45.
  For more infomation >> MINI Clubman 1.6 Cooper S Chili 184Pk Xenon, Panoramadak - Duration: 0:54.
  For more infomation >> MINI Countryman One * Leer/Nabigatie/Climate Control* - Duration: 1:02.
  For more infomation >> MINI 2.0 COOPER S AUT 192 PK CHILI SERIOUS BUSINESS LEDER RIJKLAAR!! - Duration: 0:56.
Không có nhận xét nào:
Đăng nhận xét