Thứ Tư, 30 tháng 5, 2018

Auto news on Youtube May 30 2018

XProtect Smart Client is a powerful, easy-to-use client application for viewing and managing the daily operations of a surveillance installation.

In this video tutorial, you will learn how to view live video in the XProtect Smart Client.

When you log in, your most recently selected view appears.

Depending on your permissions and XProtect version,

you can select from the views your administrator creates and the private views that you create.

The currently selected view is listed here. Let's click the view arrow.

Let's select the Dock Incoming view.

The Dock Incoming view appears.

When you place your pointer over a view item, the camera toolbar appears at the bottom.

Depending on your permissions and your version of XProtect, these buttons appear,

allowing you to apply various functions to the corresponding view.

The Independent Playback button allows you to investigate incidents by playing back recorded clips.

The Create a Snapshot feature saves a still image of the current view to a defined location on your local machine.

The Send to Printer button opens a surveillance report that you can send to a printer connected to your local machine.

The Copy to Clipboard button copies a still image of the selected camera to your clipboard.

Depending on your system and your privileges, the Start Recording for 5 Minutes button manually records the

current camera even if nothing else triggers the recording--for example, by motion.

In some configurations, the PTZ Presets button opens a list that allows you to select Pan-Tilt-Zoom presets.

To maximize any camera view item, double-click the title bar.

Double-click the title bar again to return to the previous view.

You can select different camera feeds to populate different views.

In the lower-right corner of the Hall view item, let's click More.

And then let's click Camera.

Before we continue, note that a checkmark indicates your current (default) camera.

Now let's click Server.

Click Cameras.

The available cameras appear listed here.

Again, the current camera has a checkmark. In this example, we want to see the Parking camera.

The Parking camera is displayed. You can also send a given view to a new floating window.

We'll use the More button,

select Send to Window,

and then select Main Window--Outside View.

A schematic opens that corresponds to the current view layout, with each number representing a different item in the layout.

You can send the active camera (in this case, Parking) to any of the currently configured views by clicking the corresponding number.

In this example, you do not want to do that. Rather, let's select New Floating Window.

The Parking camera displays in a new floating window that has the same functionality as those in the main window.

You could use this to continue monitoring a live view item while simultaneously playing back video from the same view.

Let's close the window.

You can also use the pane to adjust views.

In the upper-left corner of the window, click the Pane icon.

The pane appears with the Views and Cameras pane showing.

In the Private>Daytime surveillance group, we'll click New View (2 x 2).

The view you selected appears.

You can also use the Views pane to replace a camera in the view you selected. Click Cameras.

With the Server and Cameras pane expanded, a list of available cameras appears.

From here, you can drag any of the cameras to a view item to temporarily replace it.

After you alter your view, you can reload the original view by clicking the Reload View button.

The view reloads and displays the view as stored on the server.

You just saw how to view live video in the XProtect Smart Client.

Visit our YouTube site to view other tutorials in this playlist.

For more infomation >> Smart Client: View Live Video - Duration: 5:15.

-------------------------------------------

Are 'Smart' Meters Spying On You? Rockland Electric Company Says Absolutely Not - Duration: 1:37.

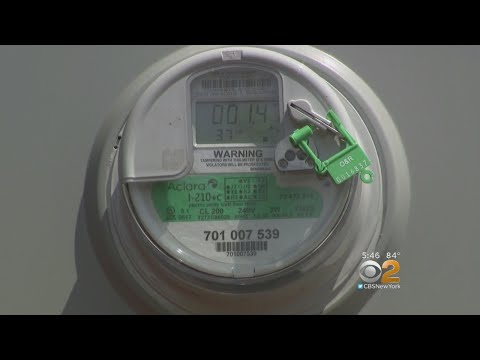
For more infomation >> Are 'Smart' Meters Spying On You? Rockland Electric Company Says Absolutely Not - Duration: 1:37.

-------------------------------------------

صنع قمامة الازبال ذكية | Making smart BIN - Duration: 6:14.

For more infomation >> صنع قمامة الازبال ذكية | Making smart BIN - Duration: 6:14.

-------------------------------------------

This Smart Suitcase Follows You… SELF-DRIVING LUGGAGE!? - Duration: 6:11.

For more infomation >> This Smart Suitcase Follows You… SELF-DRIVING LUGGAGE!? - Duration: 6:11.

-------------------------------------------

Top Smart Ways To Make a Goal - Duration: 4:10.

use referee

If you can not touch the ball before hitting the post, do that

ask for water, and use the rules of the impediment in your favor

right or left?

a 360º jump to dribble the goalkepper

free kick under wall

penalty pass

use your opponent in your favor

Did it really fail?

simulates a discussion between your team

queuing for score

synchronized movements to hamper the goalkeeper

always be prepared by an inattention

For more infomation >> Top Smart Ways To Make a Goal - Duration: 4:10.

-------------------------------------------

Dash : Smart Taler 2018, конференция о трендах в fintech-сфере, блокчейне и криптовалютах - Duration: 21:11.

Partner of the news is cryptocurrency DASH.

DASH - digital cash. First independent payment system on blockchain basis.

See more details on dash.org

Hello, everyone. You are on Rucrypto.com with Nastya and Liza.

Today we are going to have an uncommon newscast.

We are going to broadcast directly from the place setting.

We are at Smart Taler 2018

The event is being held in the HTP in the capital of the Republic of Belarus.

It is a crypto-, ICO- and blockchain-conference.

There are lots of interesting and cool people, and today we are going to talk with them.

Follow us!

Hello, Maxim. What are your event impressions?

I like it a lot. I like Minsk - it is a very sunny city.

So, this is your first time here?

Right. I have never been to Belarus before.

I also wanted to visit Vitebsk.

What for the event itself, I like the location,

and there are quite lots of people.

So, Belarus has impressed you, right?

That's right.

And what about Smart Taler?

I can see here a lot of people. It was interesting to speak at this conference.

So, you have already presented your speech? - Yes, I have. In the small hall.

Oh, I was expecting that in the big one:)

I missed it, thought it's still going to be ahead.

I present not so many speeches, need to practice, so my speech was early.

Really? What I think - is that one should go straight away.

You just step into the big stage, and that's is: not one step back.

Right. And You become a star immediately. - Of course, no doubts.

What I know about you: you work in the field of marketing

of cryptocurrencies, ICO, blockchain projects.

And as far as I know,

Google and Yandex have banned search advertising and advertising at all, which is connected with cryptocurrencies.

Has it affected your work somehow?

Yes, of course, it has. We do not use search advertising anymore...

- ...And speaking in small halls. - Right (laughing)

We cannot use Yandex, but we can use Google till the 1st of June.

We are not going to use those channels anymore.

We are going to use Mytarget, Vk, Youtube, PR, all other available channels. Mobile platforms as well.

So, there are some options. - For now, yes.

That's great. Hope, it will stay like this.

How do you think, will it affect partnership with DASH?

The partnership of our agency with DASH? - Yes!

Well, of course. We are not going to offer DASH to be promoted in the search advertising,

now it is sensless, it is forbidden.

As for the rest... Well, please, ask your question in some different manner...

Undoubtedly, it will affect it, but...what do you mean?

Well, look: will it be better, or will it be worse. Or this, in principle, will remain the same good,

but differently.

Don't know. There just will be

different channels. There is still quite big space for other promotion,

in particular, email-marketing, partners.

Integration with bloggers is a very interesting topic.

Because when a blogger is working with his audience,

this audience is real,

for instance, he has an audience of 50 thousands people,

he is making a DASH review, and many of this audience become DASH "adherents" after this.

I like the word "adherents". Cool!

Let's say, it's kind of "innovative cult" (laughing),

that only has advantages, and no disadvantages. That's it:)

I have another question which is a little boring, but important.

What events, in your opinion, could affect the price of DASH?

Do you trade?

No, I don't trade.

I prefer long-term investments,

I buy and hold.

No short-term trading for me.

First of all, DASH Evolution can positively affect the price of DASH.

DASH Evolution, right?

Yes. May be not in this year, but what can we do?

Well, there are just 6 months left till the end of this year,

so, if in the next year, then it is also cool.

Also, joining of merchants could greatly assist with this matter.

Will you tell me what it means?

Well, online-shops, that accept DASH. - Ah, here it is!

That's gonna be cool! So, what can I say more?

You are from Moscow.

Not so long ago, I broadcasted news and talked about the following:

in the Russian Federation a law about digital currencies has been passed .

Everyone thinks that it will be bad for carrying ICOs in Russia.

But in Belarus a Decree number 8 has been passed...

...have you heard about it? - Yes.

I think this is going to positively affect the inflow of

Russian ICOs here, to our country.

How do you think?

I think, yes.

In general, when we learmed about the Decree,

we had a thought like "Belarus is our second mammy",

But...there are many technical questions,

the answer to which is still unclear.

I think, everything will be solved. We are positive. We, Belarussians, as the expression goes, are a peaceful nation, you know.

I wish you good luck.

You are much closer to the goal, then Russia. This is for sure.

I hope it so. Well, we are not many, but we are persistent.

Well, the last question. It is the most serious. How do you think,

is cryptocurrency related to the planet Krypton? The birthplace of Superman?

That's a great question. Okay:)

Well, think about it.

May be it all comes from there. - Yeah, may be.

I was glad to talk to you. - Yeah, me too. - That was super-cool to get to know you.

Let's shake hands.

Watch my broadcasts on Rucrypto.- Okay! - And I will keep on looking at your pictures, as before.

We are talking to a coordinator of the Russian-language DASH community, Alexey Gusev.

- Hello. - Tell us, please, about DASH Evolution.

What perspectives does it have?

Perspectives will be evaluated by the users. We hope they will evaluate them.

Because this is mainly targeted at easy and comfortable use for end customers.

People and entrepreneurs who will like to accept

DASH as a payment.

Ease of use and ease of integration are

the main purposes and the main priorities of this project.

I hope they will see it soon and will be able to evaluate.

So, you think, this project will promote the digital currency?

We have expectations. But the market is going to decide.

We would love people to try to use DASH and see its differencies from other cryptocurrencies.

What are your impressions from this conference?

The conference is interesting. Interesting people come to talk, unlike at conferences in Russia, Moscow,

where events usually have to be paid,,

and quite seriousely paid.

Here the entrance is open for everyone,

and some interesting people come here, who are interested not only in investment,

and in ways of making money,

but there are also people

who are interested in the technology, in how it can change our life to the better.

It is interesting to talk to them. The issues are exciting.

And what are your impressions from Belarus in general?

Belarus is a great country, with nice, open, beautiful people,

so it is nice

to be here!

Thanks a lot for your time.

Smart Taler 2018

The first conference on cryptocurrencies where different coins are presented.

The general partner and sponsor is DASH cryptocurrency.

Also, DASH is organizer of this project.

We are going to talk with Helena Besedina,

who is a Ph.D. in economics,

co-founder of the DASH People project, and a marketologist.

Hello, Helena. - Hello.

I would love to talk about your project DASH People.

What useful things does it bring to DASH,

What perspectives does this project have?

Our project is targeted at promotion of DASH ideas

so that DASH could prosper on the territory of Russia, and not only there.

In Europe as well.

We are actually focused exactly on those regions.

We, of course,

are interested not only in PR-activity,

but also do some concrete moves, that is why we are impatiently waiting for

DASH Evolution, as a payment system, that

would allow us to, let's say, "show our best".

Such conferences as the one being held here today we also percieve as quite actual and reasonable for DASH,

because

if we are talking today about such a product,

as electronic money,

it is impossible to promote it

only through the Internet.

Life communication is needed.

Conferences give such a possibility.

To bring information to the audience, to those who are only stepping in the cryptoindustry,

and make some decisions for themselves.

They can listen from "first hands"

about what is going on inside,

and what is going on in DASH,

and how DASH is developing.

So, for now, here is in general what we do,

Share your impressions about this event, please.

As usual, I have positive impression about such events.

I've told in some previous interviews that

I've been to some European conferences, events,

and Asian as well,

and I can say that

regarding the information component

those conferences that are held in Russia

or as today in Minsk,

are even bigger

by their "filling"

and by their content.

Not long ago, you visited DASH Core office

in Arizona, USA. Tell us, please, about

meeting Ryan Taylor,

and share with us the plans of DASH

which were discussed.

Ryan was quite open.

He gave us time and attention.

We discussed many questions,

that are of interest today in our DASH-sphere, DASH-community,

and that provoke lively discussions.

We've seen the office of DASH Core

because I understand that this was interesting

not only for us,

butalso for the community in general.

So we tried to make such an interview

with Ryan, which is "voluminous" and

at the same time allows viewers to see the office.

I've told in my videos, that

it is a business-center that is situated in Arizona, Phoenix,

close to Phoenix,

on the territory of the University.

It's an incubator of technical or technological ideas -

kind of so they call it.

It is connected with science, research.

So, DASH Core is based on their territory.

Office is representing space in the format of co-working.

Where there is a lot of place for individual work, collective work.

And all of this is covered with sunny atmosphere, so

conditions there are wonderful,

everyone is positive,

and I liked Ryan very much. He shared some personal experience.

How he came to DASH,

why he is developing this project.

From communication with him, I felt that

he really "lives" in this project and this idea of DASH,

and this is nice.

We would also love to listen about the conference

that was held in the International Bank Institute,

that you had visited in Saint-Petersburg.

Liza, it's nice that you've asked about this.

It's a special story.

In St-Petersburg that was our first experience of conducting

such a conference

It was in the form of discussion panel.

There were several interesting speakers.

And that was a worthful idea to have chosen the International Bank Institute,

because today

in the society there is some "counter position" between

financial banking structures

and

cryptocurrencyworld, crypto-industry.

That was very interesting to get to know the point of view

of bank specialists, and future bank specialists,

because at that conference there were students and tutors.

What is their attitude towards new technologies,

including blockchain.

We've got an informative talk

Guests (students) were active.

Of course, we used the possibility to talk about DASH.

Let's say, revealed some of the processes that happen in cryptoindustry,

on the example of DASH-community.

In general, feedback was very positive

after this conference, so

in June we are planning

the next

similar event.

Will you tell us afterwards?

Of course!

Thanks a lot for your time and explained us everything. This was Rucrypto channel.

Hello, Oleg! What are your impressions from the event?

I am very inspired

by this event,

Frankly speaking, I was a bit afraid that,

as in Belarus there aren't so many of such events, I was expecting

that a similar story can take place,

as the one which happened

when we visited Nizny Novgorod.

And no-one heard about cryptocurrency.

Here the public is very active,

some interesting questions have been asked.

And there is big interest towards the DASH stand.

And to the contest of DASH Wallets installing that is being held today.

This is our first experience in this area,

it inspired us a lot.

Yes, I know, that this is your first experience.

Was it easy to organize all of this?

What difficulties did you face? How did the idea occur?

Actually,

looking at how this movement is developing in Russia,

we wanted to bring to Belarus some interesting,

famous speakers.

And we wanted to present

our project of the Territory of DASH in Belarus.

Was it difficult to do? - Yes. It was difficult.

But it should be noted

that we found partners

who, generally speaking, "took" the part of the work,

and that is why

everything what was planned

was accomplished.

Thanks to the portal kv.by,

thanks to the HTP.

And to all the team of the Territory of DASH, which has done today really good job.

It is very pleasant to hear this.

Gratitude to good people is always great.

Oleg, you've told about Nizny Novgorod.

There were some negative moments as long as I understand.

But you also say that in Russia the crypto-world is developing.

Russia should probably be "divided" into

Moscow, St-Petersburg

and the remaining Russia.

Because things that are quite usual there,

in Moscow and St-Petersburg, where

some blockchain events

happen once a week,

things are not the same in the remaining Russia. For example, in Nizny Novgorod

we faced the situation where very few people so far

know about it.

The interest is not the same.

From our conversation it can be understood

that you've visited many conferences,

including conferences abroad, in other countries.

What are essential differences

between this conference, which is now being held

in the Republic of Belarus,

and in other countries, cities.

What are significant differencies?

Let's say, in general, I couldn't see any special differencies.

Friendlier audience, may be.

They listen to you more attentively. I paid attention to this.

And

there are many questions.

I mean, at the DASH stand.

This shows real interest.

Right. And in Moscow, St-Petersburg, Kyiv

people are a bit "fed up" with such events.

They come and see the DASH stand. "Well, that's fine".

But without asking questions. Sometimes just passing by.

Because people already know

what DASH is.

And here the interest is live.

You are "integrating" DASH

in the usual people's world. Introducing cryptocurrency to people.

This is, probably, because of your teacher's background.

Has it become easier after the Decree number 8 was passed?

I've already told

in some interviews

that Decree

is just a declaration

of intentions. Belarus is showing to the world

that it has made the first step

to that cryptocurrencies and blockchain projects in Belarus

got development

and not just got development,

but had some "green light"

due to the simplified tax system,

due to that cryptocurrencies won't be subject to taxes,

It's a declaration.

But except the declaration

laws must appear, and they are quite numerous.

As long as the whole law is formed,

community that is occupied with blockchain-projects,

will understand

where they can arrive here in Belarus.

In principle, I think

that there is some positive moment in it.

Let's believe in the best. We are "Belarusian, peaceful people.

Our hearts are given to our land."

Oleg, these were some lyrics about our land.

Now I would like to speak about family.

You have a family.

Do they know about cryptocurrency?

Do they know about DASH?

Do they have DASH-wallets?

And in general, do they understand what their father, husband does?

I have a daughter,

she is in the second grade.

When asked about what the parents do,

she tries to explain to her class-mates

what cryptocurrency is, and what her father does.

So, she undersands.

Right (laughing)

Oleg, that was nice to talk to you.

In conclusion,I would love to know

The first experience is already there.

Will there be another conference

in the Republic of Belarus?

Or you are planning to

extend to

other countries?

Our position is that

we represent DASH not only in one concrete country, Belarus

but also in general in Russian-language segment.

A conference in Kazakhstan is expected.

There we are planning to present DASH.

For the month of September

there is a set of events.

Odessa,

Moscow

and Kyiv or St-Petersburg.

Now we are talking with partners.

After the discussion is over, and depending on its results

a decision on

where such a DASH-conference will take place, will be made.

I wish DASH-comunity succes. I also wish success to you.

I think everything will be cool.

I am sure. Thank you, Nastya.

For more infomation >> Dash : Smart Taler 2018, конференция о трендах в fintech-сфере, блокчейне и криптовалютах - Duration: 21:11.

-------------------------------------------

XProtect Smart Map: Add a custom overlay with a bitmap - Duration: 2:13.

Smart Map provides situational awareness on a global scale by allowing

quick access to relevant devices from anywhere in the world.

In this video tutorial, you will learn how to add a custom overlay with a bitmap.

First, click Setup.

Click the Add a custom overlay icon.

This is the parking lot so we'll name it "Nimbus Parking".

Click the File type or map service dropdown list.

We'll choose Image from the list.

Smart Map supports PNG, BMP, GIF, JPG, PHG, and TIF image formats.

Click the Browse button to select the image file.

After selecting nimbusparking.png, we'll click Open.

And click Save.

The placement is not correct, so we'll reposition the image.

We start by right-clicking to edit the position.

Next, select a corner to rotate and scale.

Now we'll move the pivot point to anchor the image to a specific reference point--

in this case, the intersection.

Once we're satisfied with the position, we save the changes.

The bitmap file is now positioned and scaled correctly.

I chose the PNG format because it supports transparency.

Let's click Setup.

You just saw how to add a custom overlay with a bitmap.

Visit our YouTube site to view other tutorials in this playlist.

For more infomation >> XProtect Smart Map: Add a custom overlay with a bitmap - Duration: 2:13.

-------------------------------------------

Smart Client: Export Video in Simplified Mode - Duration: 3:23.

XProtect Smart Client is a powerful, easy-to-use client application for viewing and managing the daily operations of a surveillance installation.

In this video tutorial, you'll learn how to export recorded video and still images in Smart Client.

Exporting video is easy in the simplified mode. Click Toggle Mode to switch to that mode.

The export process for any given camera view is accessed on the Playback tab.

Click the Playback tab.

In the simplified mode, begin with the Export button. Click Export.

You can set the start and end times a couple of different ways. Let's look at both.

Click the Start input field.

Click the Start time field and change it to 11:45 AM.

Click Close.

Set the End time the same way. Click the End time field.

Click the End time field to change it to 11:46 AM.

Click Close.

You can also select a period of time by dragging the start and end time indicators on the timeline.

To add other cameras, select the check boxes for those cameras. Select the Front Door 2 check box.

For multiple selections, you can Add all or Clear list.

In this example, you need to export only Front Door 1. Clear the Front Door 2 check box.

The video will be saved in database format to the destination you specify.

The Smart Client - Player will also be included. Click Export.

To access additional export features, you will need to switch out of the simplified mode.

Click the Toggle Mode button.

For camera views on both the Live and Playback tabs, you can save still images in several ways.

The Clipboard button copies a still image of the selected view to your clipboard.

You can then paste the image into another application.

The Send to the Printer button opens a surveillance report that you can send to a printer connected to your local machine.

The report includes a still image of the camera view at the current time, the Camera name,

the Image capture and Report print times, the User's name, and the User's notes.

The Snapshot feature records a still image of the current view to a location on your local machine.

The file name consists of the camera name, the date, and the time.

You just saw how to export recorded video and still images in Smart Client.

Visit our YouTube site to view other tutorials in this playlist.

For more infomation >> Smart Client: Export Video in Simplified Mode - Duration: 3:23.

-------------------------------------------

Suzuki Swift 1.2 Stijl Smart Hybrid Spoiler - Duration: 1:09.

For more infomation >> Suzuki Swift 1.2 Stijl Smart Hybrid Spoiler - Duration: 1:09.

-------------------------------------------

XProtect Smart Wall: Set up 3-monitor SW instance - presets - Duration: 2:58.

XProtect Smart Wall enhances the ability of surveillance personnel to

recognize, react to, and investigate incidents.

in this video tutorial, you will learn how to define a preset for our Smart Wall.

In the Properties pane for the Security Center video wall, we click the Presets tab.

Smart Wall presets display pre-configured views that operators can select or that appear based on event-based rules

In this example, we want to display video of the emergency exit when someone opens the door. So we'll click Add New.

We've typed a name and a description for the preset and now we'll click OK.

With the preset created, we'll next select a monitor and define the preset view.

In this example, we want the preset to display the emergency exits on the center monitor, so we click Center monitor.

Presets you create appear in the Preset list. The preset we want is already selected.

Now we click Edit.

The Select View Members dialog box appears for this monitor.

In this dialog box, we determine the view layout as well as the cameras we want to view.

Let's click the Layout button to define the view layout for this monitor.

In this example, we've selected the 2x2 layout. So we'll click OK.

The 2x2 layout we selected appears with empty view items.

Next we need to place cameras in the view layout. These cameras can come from device groups, recording servers, and federated sites.

In this instance we will choose the cameras from the recording server by clicking the Recording Servers tab.

Now we'll drag and drop cameras to the tiles in the view layout

And click OK.

The preset you created for the center monitor appears.

in this example, we've created preset views for each of the monitors in our video wall.

You just saw how to define a preset for our Smart Wall.

Visit our YouTube site to view other tutorials in this playlist.

For more infomation >> XProtect Smart Wall: Set up 3-monitor SW instance - presets - Duration: 2:58.

-------------------------------------------

XProtect Smart Map: Add a location & replace a geographic background - Duration: 2:37.

Smart Map provides situational awareness on a global scale by allowing

quick access to relevant devices from anywhere in the world.

In this video tutorial, you will learn how to add a location

and replace a geographic background in Smart Map.

As with all map edits, we start by clicking Setup.

You can create locations at the points on the Smart Map that are of interest to you.

For example, you can create locations for your home, office, and satellite offices.

Not only do locations give you a full picture of your environment,

but they're also useful for navigating the Smart Map.

We'll click the Add Location icon.

And click the Location Name field.

We will call it 8905 SW Nimbus.

We have the option to change the Pin color and set this location as Home,

but we won't do either at this time.

Let's click the Show or hide overlays icon to change the geographic background.

Bing Maps and Google Maps are available only if your system administrator has set them up.

We have purchased a key from Google Maps.

So we'll click the Google Maps option button.

Click anywhere in the view item to close the menu.

Google Maps is now the background.

Click Setup to exit the setup process.

Let's look at the options in Google Maps.

Click the Show or hide overlays icon.

Click the Aerial with labels dropdown list.

For a cleaner look, let's choose Road from the list.

The Road option has a simplified look.

We'll click the Road dropdown list to choose another option.

Choose Terrain from the list.

Notice the terrain option does not have buildings.

Let's set the view back to the original setting.

Click the Terrain dropdown list.

And choose Aerial with labels from the list.

Click anywhere in the view item to close the menu.

You just saw how to add a location and replace a geographic background in Smart Map.

Visit our YouTube site to view other tutorials in this playlist.

For more infomation >> XProtect Smart Map: Add a location & replace a geographic background - Duration: 2:37.

-------------------------------------------

Control Lightwave smart dimmers and sockets with Apple HomePod - Duration: 0:58.

It might be time for bed.

Yeah, I'll go and put him down for a nap.

Hey, Siri, set Fin's room light to 20%.

[Siri] All set!

With the Lightwave system we've got at the moment we're controlling all

the lights in the lounge, in the nursery. in the bedroom.

We've both got Apple watches and that's really useful when you're changing him

and you don't have a hand free to do anything else you can just talk to

the watch. We also have a couple of Sonos speakers which have

Alexa in. So we've got one in the kitchen, one in the bedroom and we use that

to change the lights as well...and we've just got a heating kit as well:

Hey, Siri, set Fin's room to 18 degrees.

[Siri]: All taken care of!

For more infomation >> Control Lightwave smart dimmers and sockets with Apple HomePod - Duration: 0:58.

-------------------------------------------

Smart Client PTZ: Adjust timeout - Duration: 1:56.

Configuring and using PTZ enhancements helps clients recognize, react to,

and investigate incidents effectively.

In this video tutorial, you will learn how to adjust the timeout for manual and reserved PTZ sessions

on a specific camera so it differs from the default settings.

In the Site Navigation pane,

we click Devices.

Then click Cameras.

We want to adjust the East PTZ camera, so click East PTZ.

In the Properties pane, we'll click the Presets tab.

We scroll down the Properties pane.

To edit the default timeout, we select the

Timeout for manual PTZ session check box.

Next, let's increase the Timeout to 30 seconds.

Click the time selector to do this.

When leaving a tab, you will be asked if you want to save the changes.

Let's select the Info tab to trigger that prompt.

Click Yes to save the changes.

You just saw how to adjust the timeout for manual and reserved PTZ sessions

on a specific camera so it differs from the default settings.

Visit our YouTube site to view other tutorials in this playlist.

For more infomation >> Smart Client PTZ: Adjust timeout - Duration: 1:56.

-------------------------------------------

XProtect Smart Map: Add a custom overlay with a CAD drawing - Duration: 2:59.

Smart Map provides situational awareness on a global scale by allowing

quick access to relevant devices from anywhere in the world.

In this video tutorial, you will learn how to add a custom overlay with a CAD drawing.

First, we click Setup.

Then we'll click the Add a custom overlay icon.

And place it in the building.

This is the first floor, suite 190.

Click the Layer name field and name it "1st Floor CAD".

Click the file type or map service dropdown list.

Use the list to select among: computer-aided design (CAD) files which can provide a detailed building plan;

image files, which can also be used to provide building plans;

and shapefiles, a popular geospatial vector data format for geographic information systems (GIS).

We'll choose CAD from the list.

If the CAD file has multiple layers, it imports as one overlay in Smart Map.

So you need to isolate the layers you need before saving the CAD file.

Click the Browse button to select the CAD file.

We select Ste190.dwg and click Open.

Some files have a Spatial Reference System Identifier (SRID) code.

Our file does not have it, so we will need to manually position, scale, and orient the CAD drawing.

Let's click Save.

The placement is not correct, so we need to position the drawing.

Right-click to edit the position.

Select a corner to rotate and scale.

Double-clicking will zoom the view to fit.

Move the pivot point to anchor the CAD file in place.

Then rotate and scale the CAD as needed.

When you are satisfied with the position, save the changes.

The .dwg file is now positioned and scaled correctly.

Click Setup.

You just saw how to add a custom overlay with a CAD drawing.

Visit our YouTube site to view other tutorials in this playlist.

For more infomation >> XProtect Smart Map: Add a custom overlay with a CAD drawing - Duration: 2:59.

-------------------------------------------

XProtect Smart Map: Create a link to a map - Duration: 1:55.

Smart Map provides situational awareness on a global scale by allowing

quick access to relevant devices from anywhere in the world.

In this video tutorial, you will learn how to create a link to a map.

Our warehouse was set up as a map.

I'll show you how to link to it from Smart Map.

First, we'll click Setup.

Then click the Add a link icon.

Click the Link type dropdown list.

And choose Map from the list.

Next, we'll click the Name field to name the link.

We named the link "Warehouse".

The warehouse map was previously created in the Smart Client and it is stored on the server (LUNA9).

We'll click Maps from LUNA9.

And select the map Warehouse.

To make it stand out more, let's change the color.

Click the Color box.

Choose the top yellow swatch.

That looks great! We'll click anywhere outside the dialog box.

And click Setup.

Now we have the link to the warehouse map.

Let's click Warehouse.

A previously defined map opens in a new window.

Click Close to close the map.

You just saw how to create a link to a map.

Visit our YouTube site to view other tutorials in this playlist.

For more infomation >> XProtect Smart Map: Create a link to a map - Duration: 1:55.

-------------------------------------------

Smart Client: Export Video Evidence - Duration: 6:12.

XProtect Smart Client is a powerful, easy-to-use client application for viewing and managing the daily operations of a surveillance installation.

In this video tutorial, you'll learn how to export recorded video in Smart Client.

You can export video from a given camera view on the Playback tab.

You must first adjust the start time and end time.

There are two ways to do this on the Advanced Timeline of the Playback tab.

Click the clock icon.

The time selection window appears. This is where you can define the start and end dates and times.

Click OK to apply the selected time range.

Time selection mode is another way to define a specific time period to export.

In the lower-left corner of the screen, click the time icon

With time selection mode toggled on, you can select a period of time by dragging

the start and end time indicators on the timeline.

Note that you can export video from either the Playback tab or the Sequence Explorer tab.

The exporting process is similar from both locations.

Click Export.

Click Export.

The Export window appears.

Note that, regardless of whether you clicked Export from the Playback tab or the Sequence Explorer tab,

the process is the same from this point on.

In the viewing pane, you can drag the brackets to fine-tune the sequence you want to export.

Use these expandable/collapsible sections to choose among the following formats:

XProtect format, Media player format, Still images

Select this option to include the XProtect Smart Client - Player application with the exported video.

The XProtect format can be viewed only with the XProtect Smart Client - Player.

Note this is an export of the video as it is recorded, without any digital zooming or de-warping.

However, it will be encoded with any privacy masking you may have applied.

Select this option if you do not want to allow the video to be re-exported.

The recipients of the export will not be able to export the sequence in any format.

Select this option to add password protection and to select the strength of the encryption you want to apply to the exported data.

Select this option to include a digital signature to your exported database.

Depending on your system settings, the data might already contain a signature.

If so, these signatures will be verified during export and, if successfully verified,

added to the export. If verification fails, the export for the device will also fail.

If you do not include a digital signature, neither the signature from the server nor the export

will be included, and the export will succeed even if the data has been tampered with.

You can also add comments to the export.

Click comments.

You can add comments to the project or to individual cameras.

In this example, you do not need to add any comments. Click OK.

In this example, you want to export in a media player format as well.

Select the Media player format check box.

From here, you can assign different properties to the media player format.

Use the Select content list to select between exporting only video or both video and audio.

Use the Select format list to select between exporting video in AVI format or MKV format.

Select the Include timestamps check box if you want to add the date and time from

the system to the exported images. The time stamp will be displayed at the top of the exported video.

Select the Reduce frame rate check box if you want to reduce the frame rate for the export.

Every second image will be included, but the sequence still plays back in real time.

Click Video texts.

Enter and format text here that will appear in the exported video.

Create new slides of text and assign the text you entered before and/or after the video here.

Click OK.

In this example, you also selected and set the export settings of Still images.

Click Start Export.

Because you chose to include a password, the Enter a password dialog box appears in which you enter and re-enter a password.

Click OK.

When the export is finished, a completed message appears. Click Details.

The Export Details dialog box appears, showing the export location. Click Details.

Details appear about the three formats you chose. Click the Export location.

In the default Video Export directory, the export folder appears. Double-click the folder.

The three export formats you chose appear in the three folders shown.

Double-click Smart Client - Player.

Type the Project password, then click Connect.

The video you exported appears in the XProtect Smart Client - Player.

The Media Player format folder contains the AVI file you exported.

The Still images folder has the set of still images you exported.

You just saw how to export recorded video in Smart Client.

Visit our YouTube site to view other tutorials in this playlist.

For more infomation >> Smart Client: Export Video Evidence - Duration: 6:12.

-------------------------------------------

XProtect Smart Map: Rearrange the order of the custom overlays - Duration: 1:18.

Smart Map provides situational awareness on a global scale by allowing

quick access to relevant devices from anywhere in the world.

In this video tutorial, you will learn how to rearrange the order of the custom overlays.

We want to move the green overlay in front of the orange overlay.

We click Setup to begin.

Then click the Manage default settings icon.

To rearrange the order, we use the drag handle in front of the overlay to drag it to a new position in the list.

Layers are ordered from top to bottom in the list.

Notice the green spaces overlay is now in front of the environmental zones.

Let's click Setup to finish.

You just saw how to rearrange the order of the custom overlays.

Visit our YouTube site to view other tutorials in this playlist.

For more infomation >> XProtect Smart Map: Rearrange the order of the custom overlays - Duration: 1:18.

-------------------------------------------

XProtect Smart Map: Use the Smart Map to navigate among locations - Duration: 2:49.

Smart Map provides situational awareness on a global scale by allowing

quick access to relevant devices from anywhere in the world.

In this video tutorial, you will learn how to use the Smart Map to navigate among different locations.

There are several ways to navigate to different locations in a Smart Map.

First, let's use the mouse.

You click and drag to navigate.

Use the mouse wheel to zoom to any level.

Details are filled in as you zoom.

Another way to navigate is using saved locations.

First, click the Select a location dropdown list.

Locations from anywhere in the world are easy to access. We'll click Copenhagen environmental zones.

In this example, the system administrator has already set up several custom locations.

We can define any of these locations as "Home". Let's click the Home icon.

Another way to navigate between locations is using links.

We'll click the Beaverton link to jump to that location.

You can see that adding a custom overlay, like this 1st floor CAD drawing, creates the location as well, if that option is turned on.

Click the Home icon.

To see a camera preview, we'll double-click the WH Entrance camera.

And then Close the preview.

Smart Map allows you to quickly view multiple cameras using the Select multiple cameras tool.

With the cameras selected, we can right-click on any of them.

From here, we can Start manual recording, Send camera, or see a Live preview.

We'll click Send camera.

And click Main Window.

The four cameras appear in a view.

We'll click Smart Map to return to the map.

You just saw how to use the Smart Map to navigate among different locations.

Visit our YouTube site to view other tutorials in this playlist.

For more infomation >> XProtect Smart Map: Use the Smart Map to navigate among locations - Duration: 2:49.

-------------------------------------------

XProtect Alarms: Respond to alarms in Smart Client - Duration: 1:54.

To enable clients to respond quickly to situations that need attention, you must configure a VMS

to detect problems and then send emails and text messages to the proper resources.

In this video tutorial, you will learn how to respond to alarms in the Management Client.

To open an alarm, click the Alarm Manager tab.

In this example, my manager has assigned this alarm to me.

I double-click the first alarm to open it.

Next, I click the State dropdown list to change the state of the alarm.

Choose 4: In progress from the list.

And click OK.

I will leave this alarm in the In progress state while I investigate the problem.

When I investigated, I found a loose connection had triggered the alarm.

I'll double-click the first alarm again to open and resolve it.

To change the status of this alarm, I click the State dropdown list.

Now I choose 11: Closed from the list.

Because of how we have set up alarms in the Management Client,

we must choose a reason for closing the alarm.

Your process might be different. Click OK.

You see the alarm is no longer in the list and is now categorized as Closed.

You just saw how to respond to alarms in the Management Client.

Visit our YouTube site to view other tutorials in this playlist.

For more infomation >> XProtect Alarms: Respond to alarms in Smart Client - Duration: 1:54.

-------------------------------------------

Smart Client PTZ: Take and Release Control - Duration: 1:47.

Configuring and using PTZ enhancements helps clients recognize, react to, and

investigate incidents effectively.

In this video tutorial, you will learn how to use the Smart Client to take and release control of a PTZ camera

in a reserved session, so you won't get interrupted by other users.

On the camera toolbar for the East PTZ camera, click the PTZ icon to open the PTZ menu.

Click Reserve PTZ session.

The PTZ camera is now reserved to you and the timer shows the remaining time of the session.

The PTZ icon turns green to indicate that you currently run the PTZ session.

On the camera toolbar for the PTZ camera that you are controlling, click the PTZ icon to open the PTZ menu.

Click Release PTZ session.

This releases the PTZ session and turns the PTZ icon gray,

which indicates that the camera is now available for other users to control.

You just saw how to use the Smart Client to take and release control of a PTZ camera in a reserved session.

Visit our YouTube site to view other tutorials in this playlist.

Không có nhận xét nào:

Đăng nhận xét